How to Choose the Right Bridal Makeup Look for Your Face Shape and Skin Tone
The look you saved on Pinterest may not be the look that works on your face. I say this gently but directly, because it is the most common disconnect I see during bridal trials. A bride walks in with a reference photo of a celebrity whose bone structure, skin tone, and facial proportions are entirely different from hers, and she expects an identical result. That is not how makeup works. The right bridal look starts with understanding your face shape and skin tone, then building a look that enhances what you already have. That is what I do at every trial, and this is the exact process I follow.
Quick answer: Match your bridal look to two things: your face shape, which decides contour, blush and brow placement, and your skin undertone, which decides your foundation, blush and lip shades. Round faces need soft sculpting, square faces need softened angles, and warm Indian undertones photograph best in golds, peaches and warm browns rather than cool silvers and pinks.
Getting married in or around Navi Mumbai? I do half-face bridal trials at ₹2,500 so you can test everything on your own skin before you decide. WhatsApp me to book a trial →
Why Face Shape Matters in Bridal Makeup
Contouring, blush placement, highlighter placement, and even brow shape all depend on the geometry of your face. The goal is not to change your face shape. It is to create balance and dimension so that your features photograph beautifully from every angle, including the ones you cannot control (low angles during pheras, side profiles during jaimala, close-ups during the vidaai).
I assess face shape during the bridal trial by pulling the bride’s hair back and looking at the outline of her face from the front. The width of the forehead relative to the cheekbones and jaw tells me the shape. From there, every placement decision follows.
Round Face
A round face has soft angles, with the width and length roughly equal. The cheeks are the widest part. Most of the brides I work with in Navi Mumbai have some degree of roundness to their face shape, so this is the contouring pattern I use most frequently.
Contour placement: I contour the hollows of the cheeks with a warm-toned product, starting from the ear and blending towards the mouth (but stopping about two fingers away from the lip corner). I also contour the temples and the sides of the forehead lightly. This creates vertical emphasis and makes the face appear slimmer.
Blush placement: I apply blush slightly higher than the apple of the cheek, angling it upward toward the temple. This lifts the face visually. I avoid placing blush on the apples directly because on a round face, that adds width.
Highlighter: Vertical placement only. Down the centre of the nose, on the cupid’s bow, and a thin line along the top of the cheekbone. No highlighter on the apples of the cheeks.
Brows: A soft, defined arch creates the illusion of more vertical space. Flat, straight brows make a round face look wider. I always discuss brow shape with the bride before threading or shaping appointments, ideally 2 to 3 weeks before the wedding.
Eye makeup: I extend eyeshadow slightly beyond the outer corner and create a lifted wing with the liner. This draws the eye outward and upward, adding visual length to the face.
Oval Face
An oval face is longer than it is wide, with the cheekbones as the widest point and a gently narrowing forehead and jaw. This is considered the most balanced face shape for makeup because most techniques work well without heavy adjustment.
Contour placement: Light contouring under the cheekbones is enough. I do not need to slim the face or add length, so the contour is subtle and focused on adding definition rather than reshaping.
Blush placement: On the apples of the cheeks, blended slightly upward. This is the one face shape where apple-of-cheek blush placement looks natural and balanced.
Highlighter: I have more freedom here. Cheekbones, nose bridge, brow bone, and cupid’s bow all work well. The face already has good proportions, so highlighter enhances without creating imbalance.
Brows: A soft, natural arch following the existing brow bone structure. Oval faces do not need a dramatic arch to create balance.
Eye makeup: Almost any eye shape and technique works. I choose based on the bride’s personal style and outfit rather than corrective placement. This is the face shape where I can go most dramatic with eye makeup if the bride wants it.
Square Face
A square face has a strong jawline, a broad forehead, and roughly equal width at the forehead, cheekbones, and jaw. The angles are defined. The goal is to soften the angularity without losing the structure, because a strong jawline actually photographs beautifully when the makeup works with it rather than against it.
Contour placement: I focus on the corners of the jaw and the corners of the forehead. These are the points that create the “square” appearance. Softening them with contour rounds the overall silhouette without making the face look flat. I keep the cheekbone contour light because adding too much shadow under already-prominent cheekbones can make the face look hollow.
Blush placement: On the apples, blended in a circular motion rather than swept diagonally. The circular application softens angular features.
Highlighter: Centre of the face: forehead centre, nose bridge, centre of the chin, and the top of the cheekbones. This draws light to the middle and away from the angular edges.
Brows: Softly curved or rounded arches. Angled, sharp brow shapes echo the angularity of the face and make it look more severe. I always recommend softer brow shapes for square-faced brides.
Eye makeup: Smoky, diffused eye looks work well because they soften the overall impression. I avoid sharp, geometric liner on square faces unless the bride specifically wants an editorial feel.
Heart-Shaped Face
A heart-shaped face has a wider forehead and cheekbones that taper to a narrow, sometimes pointed chin. The upper half of the face is visually heavier. The goal is to balance the width of the forehead with the narrower lower face.
Contour placement: Sides of the forehead and temples, lightly. I avoid heavy contour on the jaw because the jaw is already narrow and does not need further slimming. A tiny amount of contour on the tip of the chin can soften a very pointed chin.
Blush placement: Below the apples of the cheeks, blended downward slightly toward the jawline. This shifts visual weight toward the lower half of the face and balances the wider forehead. This is the opposite of what I do on round faces.
Highlighter: Centre of the chin (to add fullness to the lower face), cupid’s bow, and a thin line on the cheekbones. I avoid highlighting the centre of the forehead because it draws attention to the widest part.
Brows: Soft, rounded arches. High, sharp arches add more visual weight to the top of the face, which is exactly what heart-shaped faces do not need.
Eye makeup: The eyes are the natural focal point of a heart-shaped face, so they carry detail well. I often create more elaborate eye looks on heart-shaped brides because the eye area has space and proportion to support it.
Long (Oblong) Face
A long face is noticeably longer than it is wide, with a high forehead and an elongated chin. The goal is to create the illusion of width and visually “shorten” the face.
Contour placement: Along the hairline of the forehead and under the chin. These two areas create the visual length, and darkening them pulls them back. I keep cheekbone contour very minimal because it can make a long face look even narrower.
Blush placement: Horizontally across the apples of the cheeks, blended outward toward the ears. This is the widest possible blush placement and it adds visual width to the centre of the face.
Highlighter: Across the cheekbones horizontally and on the centre of the eyelids. I avoid highlighting down the length of the nose because a vertical highlight emphasises length.
Brows: Flatter, more horizontal brow shapes. A strong arch adds vertical height to the face, which long faces do not need. I recommend a low, extended brow shape that adds width.
Eye makeup: I extend eyeshadow outward rather than upward. A horizontal emphasis on the eyes adds width to the mid-face area. Cat-eye liner shapes work well because they pull the eye outward.
Choosing Colours Based on Skin Tone
Face shape determines placement. Skin tone determines colour. Getting both right is what makes a bridal look feel custom rather than generic. Here is how I approach colour selection across Indian skin tones:
Fair Indian skin. Soft pinks, peaches, corals, and champagne tones for blush and eyeshadow. For lips, warm rose, soft coral, or a classic red with warm undertones. I avoid cool-toned pinks and icy silvers because they can make fair Indian skin look washed out or sallow. For foundation, I choose shades with yellow or peach bases rather than pink bases, because even fair Indian skin typically has warm undertones.
Medium or wheatish Indian skin. This is the most common skin tone I work on, and it is the most versatile. Warm golds, coppers, terracottas, dusty roses, and bronze tones work beautifully for eyes and cheeks. For lips, warm reds, brick tones, deep pinks, and terracotta nudes all look stunning. This skin tone carries metallic eyeshadows exceptionally well, which is why gold and bronze smoky eyes are a classic Indian bridal choice. I avoid ashy cool tones and overly pale nudes.
Deep or dusky Indian skin. Rich, saturated colours look incredible: deep berry, wine, bold orange, warm plum, and metallic bronze for eyes and cheeks. For lips, deep red, maroon, bold berry, and warm brown nudes. Deeper skin carries bold lip colours effortlessly. For highlighter, gold rather than silver or champagne. I use cream-based products often on deeper skin tones because they blend more seamlessly and avoid the ashy finish that some powder products leave on melanin-rich skin.
The Undertone Layer
Beyond surface skin tone, undertone affects which specific shades within a colour family look best. I determine undertone during the trial by swatching products on the jawline and checking under natural light.
Warm undertones (golden, yellow, olive hints): Gold-based highlighters, warm reds, peach blushes, bronze eyeshadows. This is the majority of Indian skin.
Cool undertones (pink, reddish hints): Silver or champagne highlighters, rosy blushes, mauve lips, taupe eyeshadows. Less common in Indian skin but present in lighter complexions.
Neutral undertones (balanced, neither strongly warm nor cool): The most flexible. Most colour families work. I still lean slightly warm for bridal because warm tones photograph more flatteringly under both natural and artificial light.
A common mistake I correct during trials is using a cool-toned contour or blush on warm-toned skin. The result looks grey or muddy. Once I switch to a warm-toned product in the same darkness level, the look immediately harmonises. This is why brand and product selection matters. Not every brand’s “contour shade” works on Indian skin.
Matching Makeup to Your Outfit and Jewellery
Face shape and skin tone set the technique and palette. But the final colour decisions should also harmonise with what you are wearing. This is something I discuss during the consultation before the trial.
Red and gold lehenga (classic North Indian): Warm red or deep pink lips, gold and bronze eye tones, warm contour. The makeup should match the warmth of the outfit without competing with it.
Pastel or ivory lehenga (contemporary): Softer tones throughout: nude pink lips, champagne and peach eye colours, minimal contour. Heavy makeup will overpower a light outfit.
Kanjeevaram saree (South Indian): Rich gold eyes, kohl-defined eyes, and a bold lip in red or deep coral. The makeup should match the richness of the silk and temple jewellery without looking heavy.
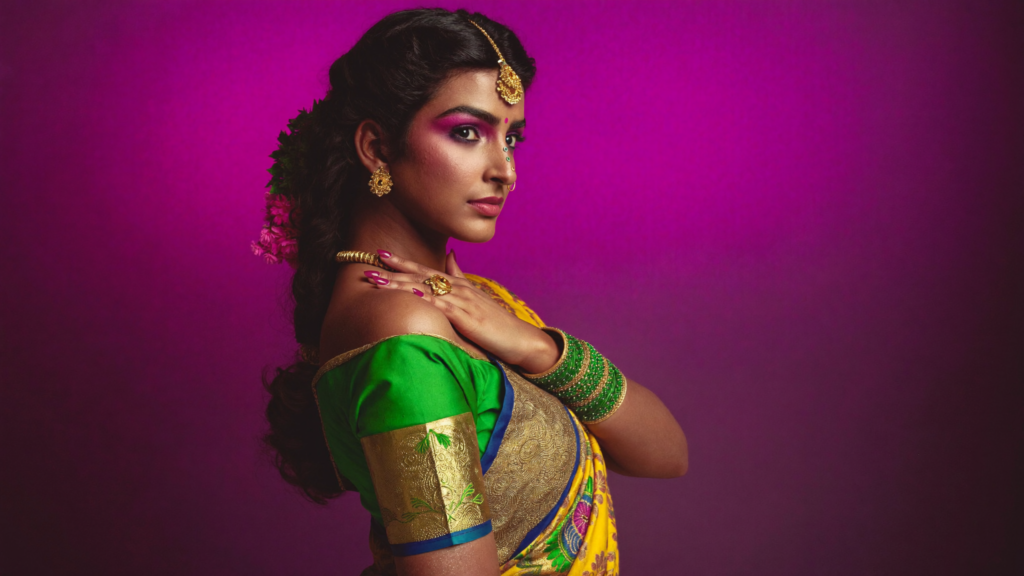
Maharashtrian bridal (nauvari saree): A clean matte or satin base with a bold lip. The green chooda and mundavalya are the focal points, so I keep the eye makeup polished but not heavy, and let the lip colour and the traditional accessories carry the look.
I always ask brides to bring their outfit (or a clear photo of it) to the trial so I can colour-match precisely. The difference between a red lip that complements a maroon lehenga and one that clashes with it is subtle but immediately visible in photographs.
Lighting and Venue: The Hidden Factor
The same makeup look appears different under different lighting. This matters for Mumbai weddings where brides move between outdoor mandaps, indoor banquet halls, and photography setups with ring lights or flash.
Outdoor daylight: Makeup should be softer and more natural. Heavy contour and dark lip colours can look harsh in direct sunlight. I reduce contour intensity and use more luminous finishes for morning and afternoon ceremonies.
Indoor warm lighting (banquet halls): Warm yellow or tungsten lighting washes out subtle makeup. I increase blush intensity, deepen the lip colour slightly, and ensure the eye definition is strong enough to read across the room.
Flash photography: I check for SPF flashback, shimmer blow-out, and ensure the base looks smooth and even. During the trial, I always photograph under flash to verify.
If your wedding has both outdoor and indoor segments, I build the look for the indoor segment (where photography is usually more extensive) and keep it camera-ready. The same look typically photographs beautifully in daylight because the techniques I use (HD foundation, light-diffusing products) are designed to perform across conditions.
The Trial Is Where Everything Comes Together
Everything in this guide, the face shape analysis, the skin tone matching, the colour selection, the undertone testing, the outfit coordination, the camera check, all of this happens during the bridal trial. That is why I consider the trial the most important appointment in the entire bridal makeup process.
During the trial, I assess your face shape, test foundation and contour shades on your skin, build the full look, photograph it under natural light and flash, and then discuss what worked and what needs adjusting. If a bride is not happy with any element, we change it before the wedding day. That is the whole point.
I recommend scheduling the trial 4 to 6 weeks before the wedding. Wear a top with a neckline similar to your bridal outfit and bring your jewellery (or photos of it) so I can see the full picture.
Frequently Asked Questions
How do I choose the right bridal makeup for my face shape?
Start by identifying your face shape (round, oval, square, heart, or long). Each shape has specific contouring, blush, and highlighter placement rules. Round faces need vertical emphasis with upward-angled blush. Square faces need softened corners. Long faces need horizontal blush and minimal forehead highlighting. A professional makeup artist assesses this during the trial and customises placement accordingly.
What bridal makeup colours suit Indian skin tones?
Fair Indian skin suits soft pinks, corals, and champagne tones. Medium or wheatish skin suits warm golds, coppers, terracottas, and warm reds. Deep skin suits rich berry, wine, bold orange, and metallic bronze. Most Indian skin has warm undertones, so warm-based products generally work better than cool-toned ones across the spectrum.
How do I know my undertone for bridal makeup?
Check the veins on your inner wrist. Green veins indicate warm undertones. Blue or purple veins indicate cool undertones. A mix indicates neutral. Your makeup artist will also swatch products on your jawline during the trial to confirm. Most Indian skin is warm-toned, so foundations and contour products with yellow, golden, or warm brown bases work best.
Should my bridal makeup match my outfit?
Yes. Your lip colour, eyeshadow palette, and overall warmth or coolness should harmonise with your outfit and jewellery. A red lehenga pairs with warm reds and golds. A pastel outfit needs softer, muted tones. Bring your outfit or a photo to the trial so the artist can colour-match precisely.
Can a makeup artist change my face shape?
Not change, but create the appearance of balance and symmetry. Contouring adds shadow where the face is wider than ideal. Highlighting draws light to areas that benefit from emphasis. Blush placement shifts visual weight. Done correctly, these techniques make the face look more balanced in photographs without looking “done” or unnatural.
How important is the bridal makeup trial?
Essential. The trial is where face shape analysis, skin tone matching, colour selection, outfit coordination, and camera testing all happen. It takes 2 to 3 hours and should be done 4 to 6 weeks before the wedding. Without a trial, your wedding day becomes the first time the artist tests products on your skin, which is a risk no bride should take.
Book Your Bridal Makeup Trial
I customise every bridal look to the bride’s face shape, skin tone, outfit, and venue lighting. During the trial, I assess your features, test products, build the full look, and photograph it under multiple lighting conditions. Share your wedding date and I will confirm availability.
★★★★★ 5.0 on Google · 26 five-star reviews from real brides