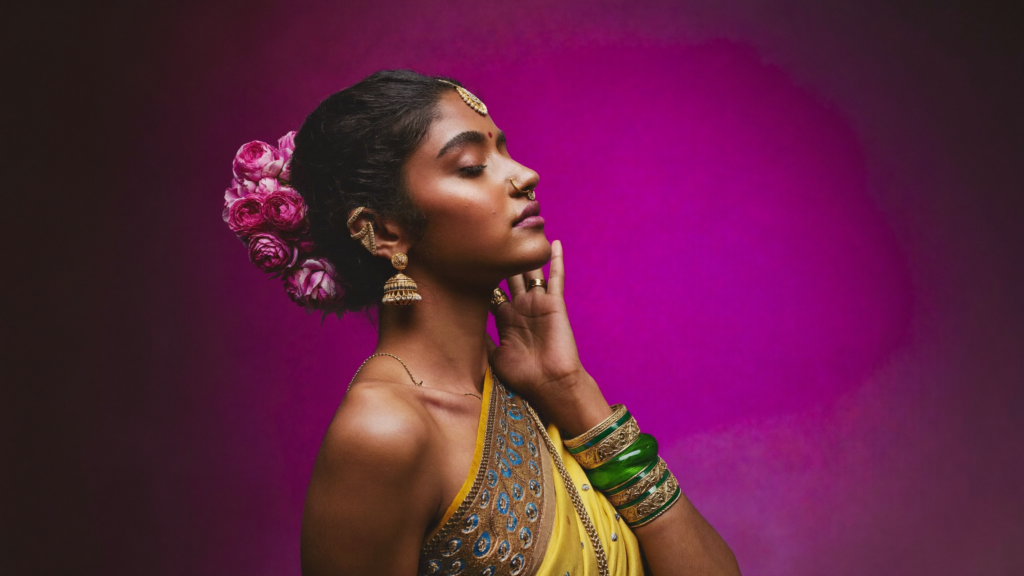
What Is a Pre-Wedding Makeup Trial?
A bridal makeup trial is a full sitting, done weeks before your wedding, where I recreate your planned bridal look on your actual skin, under conditions that simulate your wedding day. It is the single most important appointment in the entire bridal makeup process. Everything I have written in my other guides about technique, products, and face shape customisation comes together during the trial. This is where theory becomes reality on your face. Here is exactly what happens.
Why the Trial Exists
Your wedding day is not the time to discover that a foundation oxidises on your skin, that a lip colour clashes with your lehenga, that your under-eye concealer creases after 3 hours, or that the contour shade I chose looks muddy in flash photography. Every one of these problems is fixable. But they are only fixable if I catch them before the wedding day.
The trial exists to test every product on your skin, verify the look under photography conditions, check durability over time, and make adjustments while there is still time to change course. Without a trial, your wedding day makeup is an untested experiment. With a trial, it is a proven, refined plan.
What Happens During My Trial Process
Here is the step-by-step breakdown of how I run a bridal trial. This takes 2.5 to 3 hours.
Step 1: Consultation (15 to 20 minutes). Before I touch a product, we talk. I ask about your outfit (colour, fabric, neckline, dupatta style), your jewellery (kundan, polki, temple gold, pearls), your venue (indoor, outdoor, or both), your ceremony timeline (morning, afternoon, evening, or all-day), and your personal style preferences. I also look at any reference photos you have saved. This conversation shapes every decision that follows.
Step 2: Skin assessment (5 to 10 minutes). I examine your skin closely. Skin type (oily, dry, combination, sensitive), visible concerns (dark circles, pigmentation, active acne, texture, dry patches), undertone (warm, cool, neutral), and how your skin behaves in your daily environment. I also ask about any products that have caused reactions in the past. This determines which primer, foundation, and setting method I select.
Step 3: Skin prep (15 to 20 minutes). I cleanse, tone, and moisturise your skin the same way I will on the wedding day. For dry skin, I use richer moisturisers and hydrating serums. For oily skin, I use lightweight, oil-free hydration. I apply primer and let it set. This step matters because how products perform on prepped skin is different from how they perform on bare skin, and I need to see the real-world result.
Step 4: Base application (30 to 40 minutes). Colour correction, foundation, concealer, setting powder. I test the foundation shade on your jawline under natural light to confirm the match. I build the base in layers, checking coverage and texture at each stage. If the first foundation I try does not sit well on your skin (it can happen, even with experience), I switch to an alternative from my kit and retest.
Step 5: Contouring, blush, and highlighter (15 to 20 minutes). I contour based on your face shape, apply blush in the placement that flatters your structure, and add highlighter. I check the placement from multiple angles, including the side profile, because bridal photos are taken from every direction.
Step 6: Eye makeup (30 to 40 minutes). Eye primer, eyeshadow (colour palette matched to your outfit and jewellery), liner, lashes, and brows. This is usually the most time-intensive step because the eye look defines the overall feel of the bridal makeup. I discuss lash options (natural clusters vs full strips) and liner style (subtle tightline vs dramatic wing) during this step.
Step 7: Lip makeup (10 minutes). Lip liner and lipstick application. I test 2 to 3 lip colour options against your outfit (if you have brought it or a photo) and we select the final shade together.
Step 8: Setting and camera test (10 to 15 minutes). I set the look with translucent powder and setting spray, then photograph the completed look on my phone under both natural daylight and flash. This is the most critical quality check. I show you the photos immediately so you can see how the look translates on camera. Issues that are invisible in the mirror (flashback, shimmer blow-out, contour that reads too dark, foundation that looks different under flash) become visible in these test photos.
Step 9: Review and adjustments (10 to 15 minutes). We look at the photos together and discuss what works and what needs changing. Maybe the lip colour is slightly too warm for the lehenga. Maybe the contour needs to be softer. Maybe you want the eyes a bit more dramatic. I note every adjustment so I can implement them on the wedding day. This is the refinement step that makes the difference between “good” and “perfect.”
What I Catch During Trials That Would Be Problems on the Wedding Day
In my experience, here are the most common issues that surface during trials:
Foundation oxidation. Some foundations shift darker or more orange on certain skin types after 2 to 3 hours. I check for this by photographing the look at the end of the trial and comparing it to the photos I took immediately after application. If there is a shift, I change the foundation formula for the wedding day.
SPF flashback. If the bride has applied a sunscreen with high SPF before arriving, or if I accidentally select a product with SPF, the flash test photos will show a white cast on the face. I identify this immediately and ensure all products for the wedding day are SPF-free.
Concealer creasing. The under-eye area is thin and mobile. Some concealers crease within hours on certain skin types regardless of how well they are set. If I see creasing developing during the trial, I switch to a more hydrating formula or adjust my setting technique.
Colour mismatch with outfit. A lip colour or eyeshadow tone that looks beautiful on its own can clash with the bride’s outfit. This is especially common with red-toned lehengas (which vary significantly in undertone from orange-red to blue-red to maroon). Seeing the outfit fabric next to the makeup eliminates guesswork.
Comfort issues. Some brides feel uncomfortable with full false lashes, heavy contouring, or bold lip colours. The trial is where you discover this in a low-stakes environment rather than on the wedding morning when there is no time to rethink the approach.
What to Bring to Your Trial
Come with clean, bare skin. No foundation, no sunscreen with SPF (I will apply sunscreen as part of the prep), and no heavy skincare that creates a film. If you have a regular skincare routine, follow it but skip any thick creams or oils.
When to Schedule the Trial
Ideal timing: 4 to 6 weeks before the wedding. This gives enough time to make adjustments if something major needs changing (a different foundation formula, a different lip colour, a change in eye look direction) while being close enough to the wedding that your skin condition is similar to what it will be on the day.
Too early (3+ months before): Your skin can change between the trial and the wedding due to seasonal shifts, stress, skincare routine changes, or tanning. A trial done in January for an April wedding may not reflect your April skin accurately.
Too late (1 week before): If the trial reveals a significant issue (foundation does not match, the bride dislikes the overall style), there is no time to source alternative products or plan a different approach. I have had to rush-order products because a last-minute trial revealed a mismatch, and that is stressful for everyone.
For peak wedding season (October to February), I recommend booking the trial date when you confirm the bridal booking, because my calendar fills quickly.
How Much Does a Bridal Trial Cost?
Bridal trials in Mumbai and Navi Mumbai typically cost between ₹2,000 and ₹10,000 depending on the artist’s experience level and the products used. Some artists include the trial cost in the bridal package. Others charge it separately.
In my practice, the trial is a separate session with its own fee. The trial uses the same premium products I will use on the wedding day (Charlotte Tilbury, Dior, NARS, MAC, Huda Beauty), takes 2.5 to 3 hours of dedicated time, and includes the full camera test and consultation. The investment is worth it because it eliminates uncertainty.
I strongly advise against skipping the trial to save money. The trial costs a fraction of the overall bridal makeup, but it is the step that ensures the much larger investment in the wedding day look delivers the result you expect.
What Happens After the Trial
After the trial, I create a detailed note of every product I used, every shade, every placement decision, and every adjustment we agreed on. This becomes the blueprint for the wedding day. When I arrive at your home on the morning of the wedding, I am not starting from scratch. I am executing a tested, refined, proven plan.
I also send you the trial photos so you can review them at home, show them to family if you want feedback, and confirm that you are happy with the direction. If you want any changes after reviewing the photos, we discuss them before the wedding day.
Some brides wear the trial look for the rest of the day to test how it holds up over several hours. I encourage this. If you notice the base breaking down in your T-zone after 5 hours, or the lip fading after a meal, tell me. I will adjust the setting technique or product choice for the wedding day.
Can I Skip the Trial?
You can, but I do not recommend it. Without a trial, the wedding day becomes the first time I test products on your skin, the first time I see how the colours interact with your outfit under real lighting, and the first time I learn how your skin behaves over time. If anything does not work, I have to fix it in real-time on the morning of your wedding, which is exactly when you should be relaxed and calm, not troubleshooting makeup issues.
The only scenario where I might consider skipping a trial is if I have already done makeup for the bride at a previous event (engagement, sangeet) and I am confident about her skin, products, and preferences from that experience. Even then, I prefer at least a quick trial for the bridal look because the wedding day demands a higher level of precision than any other event.
Frequently Asked Questions
What is a pre-wedding makeup trial?
A bridal makeup trial is a full 2.5 to 3 hour sitting done 4 to 6 weeks before the wedding where the makeup artist recreates your planned bridal look on your skin. It includes consultation, skin assessment, complete makeup application, camera testing under natural light and flash, and a review session to make adjustments. It is the quality control step that ensures the wedding day look is proven and refined.
How long does a bridal makeup trial take?
2.5 to 3 hours. This includes 15 to 20 minutes of consultation, 15 to 20 minutes of skin prep, 30 to 40 minutes of base work, 15 to 20 minutes of contour and blush, 30 to 40 minutes of eye makeup, 10 minutes of lips, and 10 to 15 minutes of camera testing and review.
When should I schedule my bridal makeup trial?
4 to 6 weeks before the wedding. Too early (3+ months) means your skin may change. Too late (under a week) means there is no time to adjust if something needs changing. For peak season weddings (October to February), book the trial date when you confirm the bridal booking.
How much does a bridal makeup trial cost?
₹2,000 to ₹10,000 in Mumbai and Navi Mumbai, depending on the artist and products used. Some include it in the bridal package. Others charge separately. The trial uses the same premium products as the wedding day and takes 2.5 to 3 hours of dedicated time.
What should I bring to my bridal makeup trial?
Your bridal outfit or a clear photo of it, your jewellery or photos, a top with a similar neckline, reference photos, venue and timing details, and a list of any allergies. Come with clean skin and no foundation. Skip sunscreen with SPF because the artist will apply appropriate prep.
Can I skip the bridal makeup trial?
Not recommended. Without a trial, the wedding day is the first time products are tested on your skin and colours are matched to your outfit. Issues like foundation oxidation, SPF flashback, concealer creasing, and colour mismatches are only caught during a trial. The trial costs a fraction of the bridal makeup but eliminates uncertainty.
Book Your Bridal Makeup Trial
My trial includes a full consultation, skin assessment, complete bridal look application with premium products, and camera testing under multiple lighting conditions. Share your wedding date and I will schedule the trial 4 to 6 weeks before.
★★★★★ 5.0 on Google · 26 five-star reviews from real brides